



And now for something much less exciting. The other thing I have been working on is getting my air conditioner installed. When it is pushed out like it is supposed to be, it sticks out past the bumper. This could potentially cause a bad situation if I were to get rear ended while towing. In order to avoid that, the AC cannot be permanently mounted so that it can come in and out of the trailer. Not mounting it with the brackets that it comes with causes a problem of making sure it doesn't fall out of the back of the trailer. I attached a little wooden shelf to the bumper to solve the problem but I am not happy with it and I am currently researching a better way to install it. I have seen pictures of people attaching drawer slides directly to the AC. I haven't found any step by step instructions but I going to try it based on what I see in the pictures. I also ended up returning the first AC I bought because it was broken. I bought a different brand to replace it because the Goldstar had these metal clips on the bottom that were causing problems due to the fact that I am using the AC in a totally different way from which it is intended to be used.


I cut the hole in the back of the trailer for the air conditioner but my crazy dogs seem to think that it's a door for them.


 I purposely held off on putting on the front wall because I wanted to get as much framing done as possible before boxing myself in. Once the beds were framed out, I couldn't really move forward without the front wall. So I attached the front wall which then made it safe to cut out the doorway. This made a huge difference in the feel of the trailer. Now you can totally get a sense of what it will be like inside once it's done.

 I first started looking for a cooler months ago. I thought this would be something that would be very easy to find in either pink or lime green. I spent hours searching the net and watching ebay without any luck. There are plenty of small coolers in these colors but none the size that I need. I was pretty much resigned to the fact that I would have to settle for a white one when I got an excited phone call from my sister. In the break room at her job, she had spied this awesome lime green cooler. She got on the case and found out who owned it. She told the woman the whole travel trailer building story and explained why I needed her cooler. I can only imagine how that conversation went. Luckily for me, the woman was not attached to her cooler and couldn't care less about the color. She said she would be willing to sell it for the cost of a new one. SOLD!!!!! I gave her $30 for it.....a 5 year old slightly scuffed up cooler.......well worth the price. This is the first thing I have put in my camper that is the appropriate color. It is very exciting to see it in there.
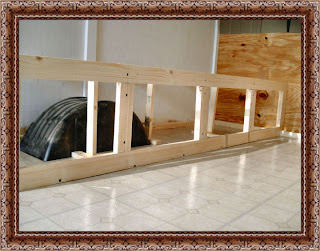

 Covering the floor was such a pain. It started when I realized that vinyl does not come in any fun colors or patterns. All of it is very serious house type stuff. So I decided to go with something really plain and unnoticeable and just put some funky rugs over it. I had read and heard mixed reviews on whether or not the tiles would stay stuck down with the adhesive that is already on the back. I spent quite a bit of time sanding and prepping the floor so I felt like it was safe to stick them down without any extra glue. I put down about half of the tiles and when I looked at it the next morning, there were already tiles peeling up. Then I had to get some vinyl glue and try to get it under the partially stuck down tiles. Obviously this was much harder to do than if I had just used the glue in the first place. This was a tedious, messy job and I'm not real happy with the way it looks. All I can say is that I'm glad about 80% of the floor will not be seen anyway.

