Monday, March 31, 2008

Zero Progress

I didn't make any progress on the trailer this weekend because I spent the entire weekend looking for light fixtures. I am very limited as to what I can use because my walls are solid. I am also limited by price as I am not going to spend a ton of money on anything that is labeled "rv" or "marine".
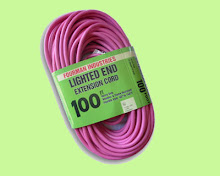
These are the first set of lights I bought. The instructions stated very clearly that these cannot be hardwired. Each light has a cord, all of the cords plug into a power strip, then the power strip plugs into an outlet. After I bought the lights I saw them installed in a store display and they looked terrible. There were cords everywhere.


These are the second set of lights I bought. These are meant to be hardwired in a series and connected to a switch. They seemed perfect and I really liked them but they use halogen bulbs which get very hot. Once I read the instructions for the spacing, I realized that I couldn't use them.
This is my third attempt. So far, it seems like this is going to work. I bought small frosted bulbs to in them and they look really cute with the tiny bulbs. I will not be mounting them on the wall. I am building shallow boxes for them and they will be mounted so that the bulbs are pointing down. It's hard to explain but I will post pictures once the boxes are done. That is unless I discover some reason why I can't use these!

Saturday, March 22, 2008

Getting Ready to Wire


This week, I have been installing electrical boxes so that I can run the wiring. Since I used solid wall construction instead of sandwich, I have to be creative in order to hide all of the electrical components. I also put in the countertop since there are 2 receptacles in the top of it. I used something I got at Lowes called fiberboard. It is supposed to be less likely to sag than plywood and it has a nice smooth surface that I was told can be painted.

Saturday, March 15, 2008

All 4 Walls and a Doorway


I purposely held off on putting on the front wall because I wanted to get as much framing done as possible before boxing myself in. Once the beds were framed out, I couldn't really move forward without the front wall. So I attached the front wall which then made it safe to cut out the doorway. This made a huge difference in the feel of the trailer. Now you can totally get a sense of what it will be like inside once it's done.

Friday, March 14, 2008

Bed/Seat #2

The 2nd bed/seat is now framed. I made it exactly like the first one so it was fairly quick and easy.

Saturday, March 8, 2008

Crates

Instead of buying new crates, I got used crates from the rescue group where I volunteer
By getting them there, I had access to a wide variety of sizes. I was able to find the perfect configuration for the space I have available. Thank you, Abby.

Thursday, March 6, 2008

How I Got My Cooler

I first started looking for a cooler months ago. I thought this would be something that would be very easy to find in either pink or lime green. I spent hours searching the net and watching ebay without any luck. There are plenty of small coolers in these colors but none the size that I need. I was pretty much resigned to the fact that I would have to settle for a white one when I got an excited phone call from my sister. In the break room at her job, she had spied this awesome lime green cooler. She got on the case and found out who owned it. She told the woman the whole travel trailer building story and explained why I needed her cooler. I can only imagine how that conversation went. Luckily for me, the woman was not attached to her cooler and couldn't care less about the color. She said she would be willing to sell it for the cost of a new one. SOLD!!!!! I gave her $30 for it.....a 5 year old slightly scuffed up cooler.......well worth the price. This is the first thing I have put in my camper that is the appropriate color. It is very exciting to see it in there.

Wednesday, March 5, 2008

Framing


*****Hey Brian, I can't find the comment you posted. It must be lost somewhere in cyberspace*******

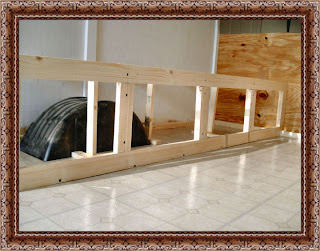
I have the door side bed/seat framed out. I don't know anything about framing so this is totally just made up. My sister and I spent almost 3 hours talking, measuring, and putting tape on the floor before we finally got started. I really like the way it turned out though. It feels very sturdy.

Saturday, March 1, 2008

Vinyl Tiles

Covering the floor was such a pain. It started when I realized that vinyl does not come in any fun colors or patterns. All of it is very serious house type stuff. So I decided to go with something really plain and unnoticeable and just put some funky rugs over it. I had read and heard mixed reviews on whether or not the tiles would stay stuck down with the adhesive that is already on the back. I spent quite a bit of time sanding and prepping the floor so I felt like it was safe to stick them down without any extra glue. I put down about half of the tiles and when I looked at it the next morning, there were already tiles peeling up. Then I had to get some vinyl glue and try to get it under the partially stuck down tiles. Obviously this was much harder to do than if I had just used the glue in the first place. This was a tedious, messy job and I'm not real happy with the way it looks. All I can say is that I'm glad about 80% of the floor will not be seen anyway.